Learn how to use the private and public file and folder sharing options available in Creative Cloud.


Synchronize files to your Creative Cloud account from your desktop or through the web. Then, share with reviewers or post your work on behance . Reviewers can view your work in a web browser, turn on and off layers, or scroll through a multi-page document even if they do not have an Adobe ID. The Collaboration feature gives reviewers more control allowing them to view, edit, rename, move, delete, or control versioning of the contents within a folder if they have a Creative Cloud account. 


Note: The interface has been updated since the time this video was made, although the features for sharing files and folders remains the same. Creative Cloud Files is now called Creative Cloud Assets. Click here to read more about the changes.


keeps all the files in sync. Any additions, modifications, or deletions are reflected on all connected computers and devices !!


Your Adobe Creative Cloud account comes with online storage so that your files are available to you anywhere and on any device or computer. You can preview many creative file types directly in a web browser on your computer, tablet, or smartphone. These file types include: PSD, AI, INDD, JPG, PDF, GIF, PNG, Photoshop Touch, Ideas, and others.

The Adobe Creative Cloud desktop application keeps all the files in sync. Any additions, modifications, or deletions are reflected on all connected computers and devices. For example, if you upload an .ai file using the Creative Cloud Assets page, it is automatically downloaded on all connected computers.


Browse assets

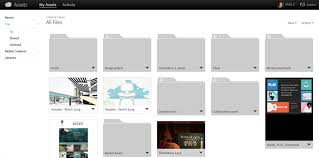
Your Creative Cloud assets include files synced with your desktop, assets created using Creative Cloud–enabled mobile apps, and Creative Cloud libraries. You can browse all of these assets using the Creative Cloud Assets page, which organizes assets as follows:

Files

shows assets synced with Creative Cloud Files directory on your desktop

Mobile Creations

shows assets created using Creative Cloud enabled mobile apps

Libraries

shows design libraries created by you

Note:

While you can perform several operations such as rename, share, download, replace, and archive on desktop assets (under Files), you can only view assets under Mobile Creations and Libraries, on the Creative Cloud Assets page.

When you click an asset category, it expands to show subcategories, if any. For example, assets under Files are further organized as All, Shared, and Archived.  

All: shows all files synced with Creative Cloud Files directory

Shared: shows files shared between you and other Creative Cloud users

Archived: shows deleted files

Similarly, you can browse assets created using Creative Cloud mobile apps under Mobile Creations, where the assets are further categorized based on the creating mobile app.

For information about libraries, see Creative Cloud Libraries.

Sync or upload files

To sync files from your computer, do one of the following:

  • Copy, paste, or move files to the Creative Cloud Files directory on your desktop.
  • In an app, choose File > Save or File > Save As and navigate to the Creative Cloud Files directory.

To open the Creative Cloud Files directory from the Creative Cloud desktop app, select Assets > Files and click Open Folder.

Note:

Filenames that contain special characters such as |, “? <, >, /, *, or: are not synced. Neither do files with reserved names, such as AUX or Com1. If you receive an error, rename the file to sync it to Creative Cloud. For more information, see Error: “Unable to sync files.”

Additionally, you can upload files directly to the Creative Cloud Assets page using any of the following methods.

Upload and manage your files on Creative Cloud using the Actions menu on the Creative Cloud Assets page.

Drag and drop assets from your desktop to the Creative Cloud Assets page.

Replace a file

Uploading the file again creates a version of the file and replaces the existing file with a new one. Creative Cloud also keeps a copy of every change you make to a file and sync through Photoshop Touch, Adobe Ideas, and the Creative Cloud desktop app.

To replace a file, using the Creative Cloud Assets page, do the following:

  1. Navigate to and open the file for viewing.
  2. Select Actions > Replace or drag the file from the folder to the browser window.

Note: The new file must be the same file type as the file being replaced. For example, you can’t replace a .PSD file with a .AI file.


Delete files

You can delete files from the Creative Cloud website or Adobe Touch Apps. You can also use the OS commands to delete files from the Creative Cloud Files directory on your desktop. All file deletions are synced with your account, and files are archived in Creative Cloud. The original files are always on your computer with a copy available on Creative Cloud so that you can access it anywhere.


Archived files continue to occupy online storage. You can permanently delete or restore files from the Archive folder. Permanently deleting the files frees up the storage quota.

Permanently delete or restore files

Follow these steps to delete assets permanently:

  1. Archive a file from your Creative Cloud Files directory on your desktop, Creative Cloud–enabled Touch Apps, or the Creative Cloud Assets page. Archived files move to the Archived category under My Assets > Files.
  2. On the Archived page, select the files to delete permanently and click Permanently Delete.
  3. In the confirmation dialog, click Permanently Delete.

You can also restore an archived file:

  1. On the Archived page, select the files to restore and click Restore.
  2. In the confirmation dialog, click Restore.


Storage plans and quota

The storage quota depends on your Creative Cloud membership.

Membership plan

Free storage quota

Free

2 GB

Creative Cloud (Photography)

2 GB

Creative Cloud (Single App and All Apps)

20 GB

Creative Cloud for teams

100 GB

You can view your storage status from the Files tab under Assets panel of the Creative Cloud for desktop app or on the Settings page of the Creative Cloud Activity page.

Storage status on the Creative Cloud desktop app


Storage status on Settings page


Creative Cloud syncs up to 1 GB of overflow from any device. After that, the Creative Cloud desktop app stops syncing new files and notifies you that you are over quota. A red exclamation point marks any files that are unable to upload. You can still move, rename, or delete files. To continue to sync files, permanently delete other files to free up space.

Note:

A small portion of storage is used for administrative purposes. Therefore, the actual storage space is slightly less than allocated. It varies from 100 KB to 500 KB based on the number of user files.


Adobe Muse – The easy way to create robust responsive sites

Adobe Muse could be a one stop for developing a good website. 
Someone who is a designer but doesn’t really know much about coding and wants to create a website, this is the major tool for that person.
Adobe Muse is by far one of the most useful softwares you’ll come across in this generation of website.
When combined with the full use of other softwares such as Adobe Illustrator, Photoshop and Indesign, this software can help you create a seamless website all by yourself.


muse-price


Here are some new features which can explain you why this is one of the best software in today’s design world. 


Creative Cloud Libraries in Adobe Muse 

Creative Cloud Libraries, powered by Adobe CreativeSync technology, enable you to access your favorite assets from home, office, or even when you’re on-the-go. Create images, colors and more using Photoshop, Illustrator, or mobile apps like Adobe Capture CC. Access these assets across other desktop and mobile apps for a seamless creative workflow.

Creative Cloud integration in Adobe Muse allows you to create your own assets and share these assets with other Creative Cloud users across the globe. You can also access, import, and use all the assets that are available through the Creative Cloud Libraries. Use the CC Libraries  Panel (Windows > CC Libraries) to access Creative Cloud Libraries from Adobe Muse.

You can now access Creative Cloud Charts through the Creative Cloud Libraries. Creative Cloud Charts enable you to create charts and insert them in Adobe Muse as linked assets. This means that your charts in Adobe Muse are auto-updated every time the data in the chart changes.


State transition

You can make your design more interesting and engaging by applying transitions to different elements on your web page. You can also set the delay, duration, and timing options for each state transition, in each element.

Select a menu or button for which you want to set the transition state. Choose Window > State. When you click the Normal, Active, or Rollover states from the Menu Item on the top panel, you can see the Transition options.

State transition in a published site depends on the browser’s ability to support W3C specification for CSS3 transitions.  


SVG graphic improvements

Adobe Muse 2015.1 allows you to import SVG files into an image frame, crop the image, and apply fill and stroke. If there are no frames, you can now import an SVG file directly, create a frame, and then crop the image. You can also add SVG images to slideshows. These SVG graphic improvements give you additional flexibility while designing slideshows.


Enhancements in Adobe Muse 2015.1

In the Swatches panel, you can now import and export Swatch libraries through the Context menu. 

Adobe Muse 2015.1 supports rotation detection in Exif content. Images that have rotation information embedded in them, will now be rotated to landscape when placed.

You can now create empty image frames by deleting the image content of an existing image frame. Double-click an image you have placed, and press Delete. The empty image frames will have placeholders.


Flash Professional is now Adobe Animate CC

Animate-price

For nearly two decades, Flash Professional has been the standard for producing rich animations on the web. Because of the emergence of HTML5 and demand for animations that leverage web standards, Adobe completely rewrote the tool over the past few years to incorporate native HTML5 Canvas and WebGL support. To more accurately represent its position as the premier animation tool for the web and beyond, Flash Professional has now been renamed to Adobe Animate CC 

Today, over a third of all content created in Flash Professional uses HTML5, reaching over one billion devices worldwide. It has also been recognized as an HTML5 ad solution that complies with the latest Interactive Advertising Bureau (IAB) standards, and is widely used in the cartoon industry by powerhouse studios like Nickelodeon and Titmouse Inc. 

Animate CC will continue supporting Flash (SWF) and AIR formats as first-class citizens. In addition, it can output animations to virtually any format (including SVG), through its extensible architecture.

There’s much more than just a name change however. Adobe team is hard at work on a major update with significant new features to create animations for any platform. Here’s a sneak peek by Michael Chaize, Principal Creative Cloud Evangelist:


Here’s what you can expect in Animate CC:

  • Drawing, illustration and authoring
    • Vector art brushes – Modify the path of a stroke after it’s been drawn, and scale them to any resolution without losing quality. You can also make custom brushes and import brushes created with Adobe Capture CC.
    • 360° rotatable canvas – Rotate the canvas on any pivot point as you draw to get the perfect angle and strokes. You can even use this feature with a Wacom Cintiq!
    • Improved pencils and brushes – Draw smooth, precise vector outlines along a curve and get faster live previews.
    • Easier audio syncing – Control audio looping directly on the timeline, without having to code.
    • Faster color changing – Naming tagged colors lets you change one color and have it automatically update your entire project.
    • Colored onion skinning – Easily orchestrate complex animations now that adjacent frames can have different color and alpha values.
  • CreativeSync integration
    • Adobe Stock – Browse and license millions of high-quality photos, illustrations and vector graphics directly in Animate CC. You can even add life to static content by adding animations to them.
    • Creative Cloud Libraries – Access colors, vector graphics and brushes directly as you work.
    • [Update 2/8: We’ve also added Typekit integration!]
  • Output capabilities
    • Multiplatform support: HTML5 Canvas, WebGL, Flash (SWF), AIR, video, and custom platforms (such as SVG) via extensions.
    • 4K+ video export – Export videos with custom resolutions for the latest Ultra HD and Hi-DPI displays.
    • Custom resolution export – Revitalize older content by resizing and optimizing them for any resolution, such as Ultra HD and Hi-DPI displays.
    • .OAM support – Export your project as an .OAM file for easy importing to Adobe Muse, InDesign, DPS and Dreamweaver.


Illustrator vs. Photoshop vs. InDesign

Illustrator vs. Photoshop vs. InDesign
Who’s who and what’s what?


In today’s post we will help you distinguish between these three products. 

All of these are the major canvas for all most every kind of modern art, be it photography, graphic designing or architecture. 
These softwares are making huge rounds in every sector today due to the sudden boom in the digital marketing and advertising fields. 


So it’s important for everyone to know the basic difference between then even if you aren’t an artist yourself. 

Use the wrong design program to create a certain element of your artwork, and you might end up with blurry text, sloppy layouts, or a logo that you can never resize without turning it into a pixelated nightmare.
But these three programs together, however, turns them into the ultimate dream team. You can maximize the strengths of each Adobe product while also minimizing their weaknesses.


When To Use Illustrator?

Illustrator is technically the favourite product for most of the designers. You can produce pretty much any type of image or file from it. Illustrator is different from Photoshop in that it is a vector based software, meaning instead of working on a pixel level, it works using lines. You can increase or decrease the size of whatever make in Illustrator, and it will never lose it’s detail. Now when you output that into a rastor based image such as a jpg, you may end up with some pixelation, but when resizing within Illustrator, you’ll never lose that detail. If you continuously resize your image in Photoshop, you will certainly distort it. 

  • What to do in Illustrator?
    Designing a Logo.
    Drawing Shapes and Graphics.


  • What not to do in Illustrator? 
    Editing Images.


When to use Photoshop?

Photoshop is a great tool, but people often use it for the wrong reasons. Photoshop is a rastor based software, meaning it works on a pixel based level. Images built using vector based software can easily become pixelated. It is the ideal software when dealing with images. 

  • What to do in Photoshop?
    Edit Images for web or print. 
    Adding Filters and Special Effects
    Manipulating Photos. 


  • What not to do in Photoshop?
    Working on images with text.
    Designing logos.
    Designing Layouts for web or print. 


When to use Indesign?

There should be no confusion about when to use InDesign – its specific purpose is for laying out printed materials; that’s what it is designed to do. This could be brochures, newsletters, ads, business cards or books. Virtually anything that is made up of a combination of blocks of text, photos or other artwork. Its purpose is to take the elements that you create in Illustrator and Photoshop and put them together in one place. InDesign excels at projects that require multi-page layouts or master layouts where one theme reoccurs on multiple pages. Its text wrap functionality (where you can literally wrap text around images or objects) is much simpler and easier to use than it is in Illustrator. 
This software should be your last step in creating a beautiful work of art. It helps you organize everything with a great layout! 

  • What to do in Indesign?
    Writing Copy.
    Designing Layouts.
    Creating Your Print Ready Files.


  • What not to do in Indesign? 
    Working on Images.
    Working on logos and shapes. 


Untitled-2

Now we have given you the perfect mixture to create the perfect art you desire to make. 
Go on, get ’em beautiful products and start creating mesmerising art.  


Know Your Adobe VIP ID!

Adobe’s VIP ID is like your ID proof for them.
This is the number which proves that you are a genuine customer. 
Adobe doesn’t really care about anything else apart from your VIP ID number when it comes to confirming whether you are true customer or not. 


So, now you know how important your VIP ID number is.


Since it’s important, we are here to help you find your VIP ID.

Before we start I would like you to know that VIP ID can only be viewed by the admin who holds the right to all the adobe licenses. 
End user can not view this ID. 


1. Go to Adobe.com and log into your adobe account. 


2. Click on “Manage Account” under your name. 

unnamed


3. In the overview option you will find “Creative Cloud For Teams” under “Plans & Products”. Click on “Manage plan” under the “Creative Cloud For Teams” option.

unnamed (1)


4. In this window under the “Plan Details” you will find “Your VIP ID”. 

unnamed (2)


Most of us could never find X during our math problems but we can find our VIP ID and that is going to help us stay with adobe longer. 

Keep Designing.
Keep Creating. 


From Inspiration To Asset Creation.


Take photos on your mobile devices with Adobe Capture CC and turn them into tools you can use in your favourite Adobe Creative Cloud apps. Extract a color theme, create a Look, change shapes into vector graphics and save assets for use in Adobe Photoshop, Illustrator and InDesign.


1.  Capture inspiration anywhere

Simply take pictures of things you like with your mobile device and start turning the world around you into color themes, shapes and unique Looks that you can integrate into your designs.

 
2.  Convert a photo into a brush
Design beautiful, high-quality brushes in styles ranging from painterly to graphic using your finger or an Apple Pencil. Working in Sketch? Launch Capture right from the Sketch app, create a new brush, and it will appear in your toolbar.
 
 3.  Turn objects into vector-based shapes
Grab an interesting object from any photo, and use your fingertip to precisely refine and edit the shape. Or create a vector graphic in Illustrator Draw by launching Capture from inside the app, and instantly apply it to your design. 
 

4.   Multitask with Split View

Seamlessly switch between Capture and your assets without leaving the page using Split View, which lets you work with multiple apps side by side on the same screen.


5.  Creative Cloud Libraries

Your assets can be saved to Creative Cloud Libraries for quick access in Adobe desktop and mobile apps. And you can share your libraries with your team directly from Capture.


Adobe Photoshop CC 2015.1

adobeblog

New Creative Cloud Libraries capabilities

Find content faster by searching across your libraries and across Adobe Stock. Drag and drop assets to and from the Layers panel, add your favorite brushes and share your library with others. And get content into libraries faster with a new bulk import dialog box.
See how it works ›

Design Space (Preview) enhancements

This dedicated mode further streamlines and optimizes design workflows with a unified sampling experience, efficient masking, robust app and cross-document search and integrated layer and batch export. Design Space (Preview) offers access to Creative Cloud Libraries as well as seamless movement to and from standard Photoshop CC.
See how it works ›

Do more with artboards

Use artboard guides and grids to precisely place elements, sort layers by artboard for easier visualization and quickly add new artboards to documents. Use artboard preferences to customize the look and feel of your documents.
See how it works ›

Modern user experience on desktop and touch devices

The updated UI delivers a clean and consistent look throughout Photoshop, and you can quickly perform common tasks using a new set of gestures on touch-enabled devices like Microsoft Surface Pro

Customizable toolbar and workspaces

Make Photoshop yours by customizing your toolbar and saving multiple toolbar configurations as parts of different workspaces. Included workspaces have been streamlined to give you quick access to only the tools you need.

Bring 3D characters into your 2D designs

Create beautiful compositions that feature 3D models and easily adjust camera angles and lighting. Start with a model created in Adobe Fuse CC (Preview), and then apply poses and animations from the Creative Cloud 3D Animation (Preview) area within the Properties panel. Composite characters into any Photoshop project from a layout to a video, or print them with a 3D printer. (Available in English only.)
See how it works ›

Find fonts faster

Quickly find the font you need by starring individual fonts as favorites. Narrow down your search by filtering fonts by classification, like serif or sans serif, or by similarity.

Export faster with more control

The exporting experience introduced in June now delivers faster performance and better compression for all file formats, especially JPEG; the ability to export the same assets at multiple sizes; support for sRGB export; and options to embed metadata such as copyright into your files during export

More creative options with SVG import

Open and place native SVG files — which can rescale for any size device or any resolution — in your Photoshop designs. Just double-click the object to edit it in Adobe Illustrator.

Quickly find the right glyph

The Glyph panel now lets you see and insert your most recently used glyphs and sort glyphs for faster browsing.

More control with Adobe Camera Raw 9 enhancements

Remove or add atmospheric haze in specific areas of your photos using the Local Adjustment Brush, Radial Filter and Graduated Filter. Plus, use the new Bird’s Eye View feature to navigate zoomed-in images, and get support for more cameras and lenses.
Learn more ›

And so much more

Also includes: The ability to see and edit type layer position in the Properties panel; reintroduction of the Oil Paint filter; the ability to resize the Export dialog; Device Preview connectivity improvements; a preset value of 16pt in the Font Size dropdown menu; and more.
See full release notes ›


Introducing Adobe Capture CC

From inspiration to asset creation: Turn any photo into a color theme, Look, vector graphic or unique brush that you can use in your creative projects.


In June, we released Adobe Hue CC, a mobile app that allows you to capture color and light as you see it, saving these dynamics as Looks to enhance your video files. Today, we’re pleased to share that Adobe Hue’s features are now available as part of a brand-new app, Adobe Capture CC, available for iOS and Android.

Adobe Capture CC combines the power and full capabilities of Adobe Color CC, Shape CC, Brush CC and Hue CC to give you the ability to create color themes, custom brushes, vector graphics and unique Looks from a single photo in a simple workflow. Check it out:

Use these production-ready assets in all your creative work. Through CreativeSync, the inspiring light dynamics, color themes, shapes and textures you capture will be instantly available to use in Premiere Pro, After Effects, Premiere Clip, Photoshop, and more. Any Looks (as well as color themes, brushes, and vector shapes) you’ve previously saved to your Creative Cloud libraries through the individual apps will be automatically available within Capture CC, so you can keep on capturing inspiration wherever it strikes.

Want a jumpstart on a unique library? Check out “Inspired by Amsterdam” created by Team Adobe using Capture CC, and download these production-ready assets to use in your video, photo, and design work:http://adobe.ly/1L5ERc4

InspiredByAmsterdamHeaderRead about what inspired us here.

Watch this tutorial to see how you can bring vector graphics created with Adobe Capture to life in After Effects CC.

Create a Custom Look with Capture CC

01 04

To create a unique Look with Adobe Capture, tap on Looks. Tapping the + icon will launch your camera so you can capture the moment – just point your device at something and Adobe Capture will visualize the color and light available in that scene as a slowly rotating array of color bubbles. If you want to create a Look from an existing image, tap on the photo icon on the lower right to access images on your device, Creative Cloud account, or the Market.

Let’s talk about those bubbles for a moment. Rather than snapping a picture, when you create a Look, Adobe Capture CC creates a snapshot of the color and light in a scene, visualized as a rotating bubble array. If you are familiar with a 3D Histogram, you will see the similarities with the Looks capture screen. Horizontally, the hue angles are arranged around the rotating axis in the same positions you would find them on a traditional color wheel. The vertical axis shows the amount of light: Darker tones are lower down in the image, the lighter ones higher up. The size of the bubble references the amount of that color in the image.

CaptureLooks

After you tap the capture button, a simple refine screen opens.

The preview image in the top half of the screen shows how your Look will impact an image or video clip. Because the Look will impact different scenes differently, try auditioning it on some of your own footage to see how the Look will transform it! Add your own reference image or video clip by tapping the … icon.

On the bottom half of the refine screen, you can make adjustments to your Look:

  • Change the midtone-shift for your Look
  • Adjust the intensity of the Look

Tap any color bubble to shift the midtones in your preview image toward that color (a small highlight ring shows you which one is selected). Changing the midtone will shift the whole Look, so the impact can be pretty significant, especially on neutral tones in the target image. The slider lets you make the Look more dramatic or more subtle.


TIP: You can tap and hold the reference image to see the “before & after.” After you’ve saved a Look, tap on the Look in your library. Under the preview tab, you can swipe through all of your preview images and clips, and you can share a before & after image (as well as a link to the Look itself) with your collaborators.

Once you are satisfied with the Look, tap Next to name your Look and save it to a library. The magic of Adobe CreativeSync makes it available to use in Premiere Pro, After Effects, and Premiere Clip.


Creative Cloud: Driving Innovation Forward at MAX 2015


In June, Adobe announced the 2015 release of Creative Cloud and revealed CreativeSync, which intelligently connects your desktop and mobile apps with the assets you use every day. Today at Adobe MAX in LA, we’re continuing to push connected creativity forward by delivering even more Adobe magic in new mobile apps and the Creative Cloud desktop apps.


Design on the Go with New Mobile Apps

Photoshop Fix lets you retouch and restore images right on your phone or tablet. Popular Photoshop desktop app features, like the Healing Brush and Liquify, are easy to use with the touch interface, so you can now do real retouching work right on your iPad and iPhone.

Adobe Capture CC makes it even easier for you to use your mobile devices to capture what inspires you and quickly create a brush, shape, or color theme for professional work. The new Adobe Capture CC brings Adobe Brush, Adobe Shape, Adobe Color and Adobe Hue into a single, powerful, simple-to-use app.

In addition, we’ve updated other essential connected Creative Cloud mobile apps, including Photoshop Mix, Photoshop Sketch, Illustrator Draw, Comp CC and Premiere Clip. Click the links above to see all the newest features.

Touch and More Coming to CC Desktop Tools

Since Adobe MAX last year, we’ve been optimizing our tools to make it more natural for you to design with gestures on Windows touch devices. Today, we’re announcing brand new Touch Workspaces in our most popular Creative Cloud desktop apps. InDesign users will be able to create layouts with the Touch Workspace. In the video apps, you will scrub clips, drag and drop them into the Timeline, navigate between panels in a group and more – all through touch gestures. And in Photoshop, we’ve refined the touch experience so you can perform many of common tasks more quickly.


New for Graphic Designers


  • The next update to Photoshop CC will be tightly integrated with the brand newAdobe Fuse CC (Preview). Fuse lets you create realistic 3D models, easily insert the 3D model into a scene in Photoshop CC with the power of CreativeSync, apply poses and animations, and adjust camera angles and lighting. Fuse is also a fast and flexible new way to create stunning 2D image compositions with 3D-like depth.
  • The new Shaper tool in Illustrator CC gives you the functionality of 12 different tools and panels in a single tool. Draw basic shapes like circles, squares, and polygons, and the Shaper tool quickly and intuitive creates perfect geometric shapes for you. Plus, these will be Live Shapes so they are nondestructive and easily editable.
  • InDesign CC will update Publish Online, allowing you to embed a document directly in a website.


New for UX & web


  • Artboards improvements in Photoshop CC include guides for precise placement of elements, easier visualization of layers and the ability to customize the look and feel of your documents. The Photoshop CC release will also deliver the first version of Design Space, a modern design experience, inside Photoshop CC, streamlined for the requirements of web, UX and mobile app designers.
  • Project Comet is a brand new Creative Cloud app currently under development, aimed at designing and prototyping web and mobile user experiences. We welcome you to be a part of the development process – sign up for the technology preview now.
  • Web designers will love the new 64-bit version of Dreamweaver CC. We’ve added responsive design capabilities using new visual aids and the latest Bootstrap framework.
  • Muse CC adds free-form responsive design to easily create custom websites that dynamically scale to any size screen, browser or device, without having to code or use restrictive templates.
  • Flash Pro CC has been adding support for HTML5 and today we announced the ability to publish animations to multiple platforms including HTML5 Canvas, WebGL or even custom platforms – and with this release we are adding support for 4K video formats.


New for Video


We also have an incredible amount of Adobe Magic that’s going into our video products which we previewed recently at IBC. Having set the standard for the best native file format support in the industry, we announced that:

  • Premiere Pro CC ushers in the new era of UltraHD via comprehensive native format support for editing beautiful 4K-to-8k footage, and advances color, with support for High Dynamic Range (HDR) workflows in Premiere Pro CC.
  • After Effects CC now has the powerful and accessible color tools and color workspace that Premiere Pro has.
  • Audition CC introduces Remix, a new audio feature that automatically rearranges music to any duration while maintaining the aural integrity and structure of the piece.


Adobe Stock 


We’re deepening our Adobe Stock integration into our CC desktop apps so you can easily search for and browse assets directly from Creative Cloud Libraries. For customers who have an Adobe Stock subscription, stock content can also be directly licensed from within the CC apps for use in projects, saving time and effort. We’re also adding video to Adobe Stock, which can be used for corporate videos or commercial use in advertising, television shows, websites, and more. Additionally, Adobe Stock has new features just for businesses, offering pooled licenses at no extra cost to Creative Cloud for Team customers, as well as Extended Licenses for usage of stock content in large print runs.   

Millions of high-quality images, curated by Adobe.

Search 40 million royalty-free, high-quality photos, illustrations, and graphics. Pay per image or choose a subscription.

 
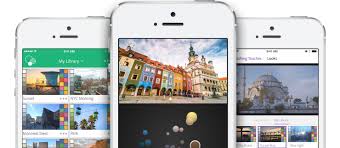
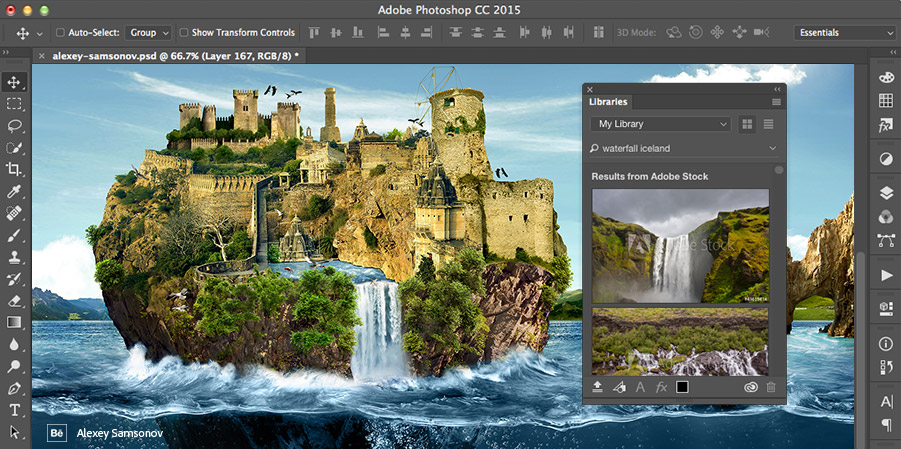
World-class images right inside Photoshop and other Creative Cloud apps.

Find the perfect photo or graphic to jump-start your next project and make it amazing. Purchase, access and manage your images directly from Photoshop CC, Illustrator CC, InDesign CC and other Adobe CC desktop apps.


Introducing Adobe Portfolio


Finally, today we are introducing Adobe Portfolio, a new service that lets you create a fully customized, responsive portfolio of work on your own domain – without having to write a line of code. Available soon, Portfolio be included as part of all Adobe Creative Cloud plans. Portfolio is built on Behance, which means you can sync your Adobe Portfolio to your Behance Projects pages with a click, giving you even more opportunities to get your work discovered in the world’s largest creative social network.


Build a website in minutes with Adobe Portfolio.

When your creative work is your life’s work, nothing is more important than having a beautiful portfolio website. With Portfolio – which comes free with any Adobe Creative Cloud plan – you can quickly and simply build a website to showcase your creative work, so you can get back to doing what you do best.


More Ways to Transform Your Photos with Photoshop Magic

We are also adding a lot of innovation to Creative Cloud Photography. We’re bringing even more Photoshop magic to Lightroom CC across desktop, web and mobile. We’ve added the ability to apply Dehaze more precisely, so you can control in the image exactly where you want to decrease or increase atmospheric haze.

Photoshop CC has several Adobe Camera Raw updates, including the addition of Dehaze as a local adjustment. We’ve also updated the way Zoom works so it is now easier and more intuitive to move around your image when zoomed in. Read the Photoshop Blog for more.

With this release we have made significant improvements in making the on-boarding to Creative Cloud photography easy and accessible to a broader photography hobbyist market. The new Import tool automatically identifies photos from your camera card, hard-drive, Photoshop Elements, Aperture and other sources, and easily imports them into Lightroom. Plus with this release of Lightroom mobile you can take photos and apply Dehaze and other Photoshop magic as you capture the moment. These are just a few of the new features, read all about them on the lightroom blog.

All of the new apps and technologies in Creative Cloud continue to deliver on our promise to drive innovation in the apps and services you use to do your best work. We can’t wait to see what you create next.